In today’s IT world, moving Hyper-V virtual machines between systems is key. This is vital for managing data well and keeping things running smoothly. Since more companies use virtualisation, knowing how to migrate Hyper-V is important. Being able to move a virtual machine easily means resources are used well. This boosts productivity. This article looks at different methods and best practices for Hyper-V machine transfers. It aims to help IT experts manage this important part of their work confidently.
Understanding how to move these virtual setups is crucial, not just for tech reasons but for business strategy too. As we discuss how to export and import Hyper-V, and using PowerShell, we’ll highlight how to better manage data migration. This knowledge prepares you well for upcoming tasks.
As more organisations adopt virtualisation, it’s crucial to know about technologies like Microsoft Hyper-V. Hyper-V is a strong tool for managing IT infrastructure. It makes resource allocation and operations more efficient.
What is Hyper-V?
Microsoft developed Hyper-V, a leading virtualisation platform. It supports versions of Windows Server up to 2025. This tech lets multiple virtual machines run on one physical machine. It boosts resource management and flexibility in IT infrastructures. Hyper-V offers dynamic memory and virtual network adapters for top performance in virtual spaces.
The Role of Virtual Machines in IT
Virtual machines (VMs) act like software-based computers, vital for today’s organisations. They allow various operating systems to run on one hardware platform. This supports testing, development, and deployment without needing many physical servers. Their key benefits include:
Isolating workloads for better security and stability.
Scalability to meet business needs.
Consolidating resources to cut costs and boost performance.
Understanding how virtualisation supports IT infrastructure is key. Virtual machines help deliver efficient services and improve data centre operations.
512MB (recommended 1GB for Windows Server 2012 and later)
Virtual Hard Disk Type
Dynamically expanding, starting at minimum size and growing up
Security Risks
Enhanced session mode not activated may expose vulnerabilities
Dynamic Memory
Allocates up to 1TB depending on the host’s capacity
Key Considerations Before Transferring
Moving a virtual machine between Hyper-V hosts needs careful planning and knowledge of certain needs. Without the right prep, you might face disruptions. Making sure Hyper-V hosts are compatible, and meeting needed requirements, makes a smooth transfer more likely.
Compatibility of Hyper-V Hosts
Checking if Hyper-V hosts work together before a transfer is key. Each Hyper-V version has its own setup steps which must match. Usually, moving to newer versions works well but going back can cause issues. Knowing these details helps avoid mistakes during the move.
Requirements for Successful Transfers
Following the virtual machine transfer requirements is crucial for a good move. You need the right permissions to start. The target server must be ready for Hyper-V, with everything set up, including network and storage. Making sure the processors are compatible is essential too, sometimes requiring special settings to work right.
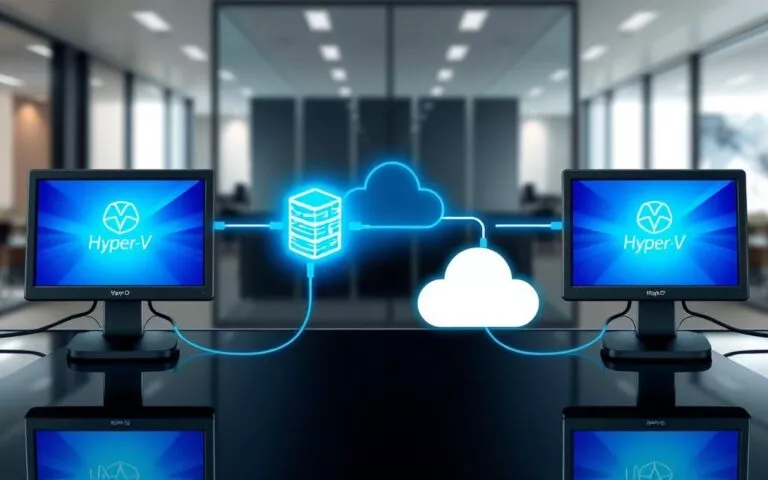
How to Transfer Hyper-V Virtual Machine to Another Computer
Transferring a Hyper-V virtual machine needs careful planning. Success hinges on knowing the process whether you use Hyper-V Manager or PowerShell. We will cover how to export and import virtual machines below.
Exporting a Virtual Machine Using Hyper-V Manager
Begin by opening Hyper-V Manager. Right-click on the virtual machine you want to move and select ‘Export’. You’ll choose a location to save the exported files to. After exporting, all files needed, like virtual hard disks and settings, are in one folder. This makes the process organized for the next steps.
Utilising PowerShell for Exporting
For a more script-based approach, PowerShell is perfect. The command `Export-VM -Name -Path ` brings flexibility. It’s great for automating exports in big setups. This method makes managing many virtual machines smoother.
Importing the Virtual Machine
After exporting the virtual machine, the import process begins. Use either Hyper-V Manager or PowerShell for this. In Hyper-V Manager, click ‘Import Virtual Machine’. Choose your exported files and follow the wizard. Or, use PowerShell and the command `Import-VM -Path ‘‘` for tailored importing. You can register in-place, restore, or copy the virtual machine.
For more on data management and safeguarding user info, visit our privacy policy.
Exporting Method
Use Case
Tool/Command
Using Hyper-V Manager
Manual export suitable for fewer virtual machines
Hyper-V Manager GUI
Using PowerShell
Automation for batch processing and larger environments
Export-VM -Name -Path
Alternative Methods for Transferring Virtual Machines
In the VM management world, looking into different VM transfer methods can make things easier. There are two main ways worth noting. One involves directly copying VHDX files. The other uses live migration. Each has its benefits, fitting various situations.
Directly Copying VHDX Files
If you’re after simplicity, copying VHDX files directly is a smart choice. You need to turn off the VM and move its VHDX file to the new host. Then, just set up a new VM to use this VHDX as its main disk. Though it might not check for all compatibilities, this way often works well for straightforward moves.
Using Live Migration Techniques
Live migration with Hyper-V lets you move running VMs between hosts smoothly. There’s hardly any interruption. Both the starting and ending hosts need to be compatible. You can use either Hyper-V Manager or PowerShell. This method is great when you need things to keep running without a hitch, perfect for busy environments.
Moving Hyper-V virtual machines needs careful planning and knowledge of what works together. Methods like using Hyper-V Manager, PowerShell, or copying VHDX files help. Each method has its perks, fitting various requirements for managing virtual setups well.
Using the best ways to do virtualisation is key for moving machines without trouble. Knowing the tech and gear needed makes a big difference. Helpful advice on moving Hyper-V machines is at this link.
Having a good plan leads to better IT management. Following these steps, IT pros can improve how they handle virtual technology. This makes their setups run well and stay up-to-date with new tech changes.
FAQ
What is Hyper-V and how does it function?
Hyper-V is a technology from Microsoft that allows a computer to run multiple virtual machines. It helps manage resources better and gives flexibility in IT setups. This makes it key for today’s IT systems.
Can I transfer a Hyper-V virtual machine to a host with an older version of Hyper-V?
No, you can’t transfer virtual machines to an older Hyper-V version. The versions of Hyper-V and the VM need to match to move them successfully.
What are the requirements for a successful Hyper-V virtual machine transfer?
To transfer successfully, you need the right admin permissions and a prepared target Hyper-V server. You must also sort out network and storage settings. If the hardware is different, processor compatibility must be considered too.
How can I export a virtual machine using Hyper-V Manager?
Open Hyper-V Manager, right-click the VM, and choose ‘Export’. Pick where to save the necessary files. This includes virtual hard disks and settings.
What PowerShell commands can I use for exporting Hyper-V virtual machines?
Use `Export-VM -Name -Path ` in PowerShell to export VMs. This is good for managing many exports at once.
How do I import a virtual machine after exporting it?
Use Hyper-V Manager or PowerShell to import a VM after exporting. In Hyper-V Manager, click ‘Import Virtual Machine’. Then follow the wizard. Or, in PowerShell, use `Import-VM -Path ‘‘` for more control.
Is it possible to transfer a virtual machine by directly copying VHDX files?
Yes, you can transfer by copying VHDX files. This doesn’t save the VM’s settings or checkpoints. Stop the VM, copy the VHDX file to the new host, and set up a new VM with that disk.
What are live migration techniques in Hyper-V?
Live migration moves running VMs between hosts without stopping them. This keeps services going. Both hosts need the right setup for this to work.
Why is it important to understand the transferring process for Hyper-V virtual machines?
Knowing how to move Hyper-V VMs is vital. It helps IT experts migrate data smoothly, avoiding issues. This makes operations run more efficiently.
In today’s fast-moving business world, it’s vital to be able to copy Hyper-V virtual machines across different computers. This boosts how we handle data and manage tasks. Whether it’s for staging, testing, or backing up data, knowing how to export and import VMs is key. We will cover the importance of moving Hyper-V VMs and…
Technology grows fast, making virtualization vital for fans and experts. Microsoft’s Hyper-V is a top tool. It helps create and manage virtual machines. Yet, it’s mainly for Windows 11’s Pro, Enterprise, and Education editions. So, Windows 11 Home users wonder if they can use this strong feature. Windows 11 Home doesn’t directly support Hyper-V. But,…
Connecting Hyper-V to your local computer boosts the power of virtualisation. Today, many users see the benefits of using virtual machines. It’s vital to know how to fit Hyper-V into your daily tasks smoothly. With 78% of Hyper-V hosts running Windows, features like enhanced session mode make a big difference. They allow you to use…
Many are curious if you can use Hyper-V with Windows XP. Hyper-V is made by Microsoft for modern systems. Sadly, Windows XP, supported until April 2014, cannot use this high-tech virtualisation tool directly. Even though Windows XP doesn’t naturally work with Hyper-V, there’s a workaround. It involves making a virtual machine, but your computer must…
Starting to build a high-performance gaming rig? Picking the right hyper PC case is key. This choice shapes your setup’s look and impacts your system’s cooling and lifespan. With so many options out there, it’s vital to know what you need. This includes things like motherboard fit, case size, and cooling ways. We’re here to…
The Hyper Tough HT300 PC software brings you advanced OBD2 software tools. These tools are perfect for changing how we diagnose vehicles. They work with the Hyper Tough HT300 scan tool. This lets users see real-time data and diagnostic trouble codes (DTCs). It has a simple interface that makes analysing and fixing cars easier. This…