Hyper-V is a strong tool in some Windows 10 versions. It lets you use many operating systems at once on your PC. This is great for anyone wanting to try out new programs or systems safely. It makes creating and using virtual machines easy, boosting your work efficiency.
To start using Hyper-V on Windows 10, you need to know a few key things. This includes understanding which Windows features to turn on and checking if your computer can handle it. This guide is perfect for both experts and newbies. By following the steps we’ll discuss, you’ll be ready to use virtualisation. For more details, check this step-by-step tutorial.
Hyper-V is a strong virtualisation technology that lets people create and manage virtual machines easily. It highlights the simplicity in hardware management and boosts the efficient use of resources.
What is Hyper-V?
Microsoft developed Hyper-V to make isolated environments on a physical machine. It lets each virtual machine work on its own. This means you can use many operating systems at the same time. Hyper-V supports Windows, Linux, and FreeBSD, meeting the needs of various users.
Advantages of Using Hyper-V
Hyper-V offers many key benefits:
Efficient Resource Utilisation: It makes the most of hardware, improving performance for all sorts of tasks.
Cost-Effective Solutions: Running many virtual machines on one host saves money on hardware.
Enhanced Security: Its isolated environments help keep processes safe, simplifying security and testing.
Greater Flexibility: Users can try out different settings or software without risking the main system.
Software Development and Testing: It allows developers to set up many environments for system compatibility checks.
Running Legacy Applications: It’s great for hosting older software not supported by new operating systems.
Remote Work Solutions: Virtual machines offer secure app access for remote users, keeping work flowing smoothly.
These uses highlight Hyper-V’s role in enhancing productivity and efficiency for IT pros and home users alike. It shows how virtual machines can be a big help.
System Requirements for Hyper-V
Before using Hyper-V, knowing what it needs is key. You must think about both software and hardware to make it work right. This ensures Hyper-V runs smoothly.
Operating System Compatibility
Hyper-V works with various operating systems. These include Windows 10 Pro, Enterprise, and Education. It’s also good with Windows Server versions up to 2025. Always check if your system supports Hyper-V before setting it up.
Hardware Specifications Needed
Hardware details are critical for Hyper-V. Your computer must have a 64-bit processor with SLAT for Hyper-V. At least 4 GB RAM is needed, more if running many virtual machines. Also, check for Intel VT or AMD-V to support virtualization.
BIOS Settings for Virtualization
Bios setup is crucial for Hyper-V. Turn on virtualisation support in BIOS, like Intel VT-x or AMD-V. On Intel, enable DEP with the XD bit, and AMD uses the NX bit. Setting these correctly lets your system use Hyper-V well.
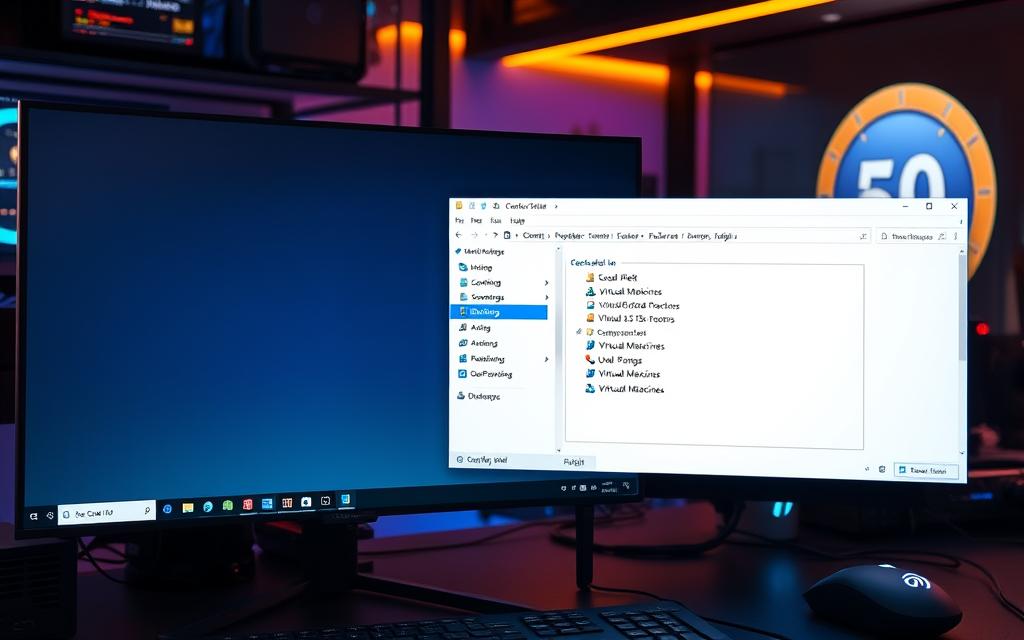
Steps to Enable Hyper-V on Windows 10
You can enable Hyper-V on Windows 10 through different ways, suited to what you like. It’s part of the operating system, letting you manage virtual machines easily. We have the steps for enabling Hyper-V using the Control Panel, PowerShell commands, and DISM tool below.
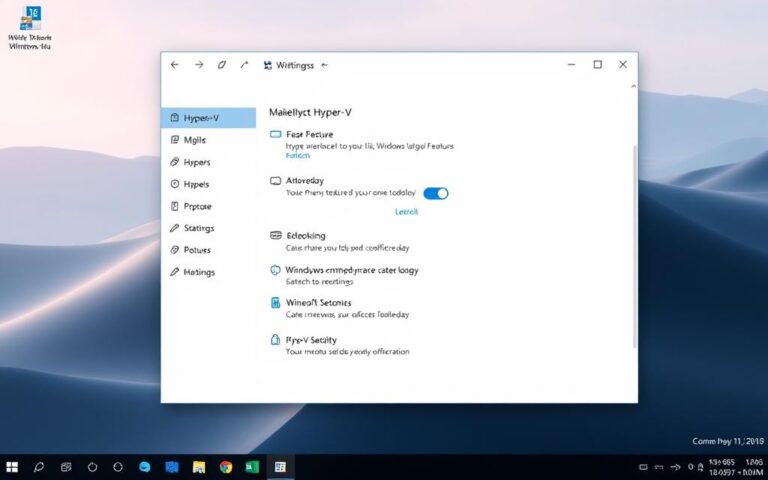
Using Control Panel
To turn on Hyper-V via Control Panel, just follow these easy steps:
Open the Control Panel from the Start menu.
Choose “Programs” and then select “Turn Windows features on or off.”
Find Hyper-V, make sure its box is ticked, and then hit “OK.”
Restart your computer to make the changes happen.
The Control Panel makes it easy, especially if you’re not big on using command-line tools.
Using PowerShell
If you’re up for a more advanced method, PowerShell is the way to go. It makes the process quick with just one command:
Open PowerShell as an Administrator and type in this command:
This method is crucial for turning on features right in the system, showing how handy DISM is.
For extra info on making your experience better and handling cookies, check out the Cookie Policy.
Enabling Hyper-V Through PowerShell
Using PowerShell is a top way to turn on Hyper-V on Windows 10. It lets users type commands directly, making the setup smoother. Make sure to start PowerShell with admin rights. This step is key to making the commands work.
Opening PowerShell as Administrator
First off, find PowerShell by looking it up in the Start menu. Right-click the PowerShell icon and choose “Run as administrator”. Doing this allows you to have the rights to carry out the commands needed for setting up Hyper-V with PowerShell.
Executing the Command
With the right privileges set, type in the command below:
This starts the enabling of Hyper-V. Watch for any errors or messages that show it’s been turned on successfully.
Rebooting the System
After you’ve run the command, reboot your computer. This restart makes the changes work and gets Hyper-V ready to use. Be sure to reboot your system to prevent any issues when using this new feature.
Step
Description
1
Open PowerShell as Administrator.
2
Execute the command: Enable-WindowsOptionalFeature -Online -FeatureName Microsoft-Hyper-V -All.
3
Reboot the system for changes to take effect.
Configuring Hyper-V Settings
Once you’ve enabled Hyper-V, you’ll need to set it up to get the most out of it. Starting with the Hyper-V Manager is your first step. It’s a place full of tools to help make your Hyper-V work just right for you.
Accessing Hyper-V Manager
The Hyper-V Manager is key for managing your virtual machines (VMs) smoothly. It lets you easily work with Hyper-V hosts and their VMs. It’s user-friendly, ideal for those just starting out. To open it, just search for “Hyper-V Manager” in the Windows search bar.
Creating a Virtual Switch
To connect your VMs to the outside world, you need a Virtual Switch. Hyper-V has three switch types: External, Internal, and Private. The one you choose depends on what you need:
External: This connects your VM to the outside network, letting it talk to other computers.
Internal: This lets VMs on the same host, and the host itself, communicate.
Private: This keeps your VMs talking just to each other, away from the host.
Setting up a Virtual Switch is easy in Hyper-V Manager. It just takes a few clicks, and your VMs can interact smoothly with networks.
Adjusting Virtual Machine Settings
Getting the VM settings right is crucial for top performance and efficient use of resources in Hyper-V. You should look into:
Setting
Description
Recommendation
Memory
Set how much RAM each VM gets.
Stick to static memory for stability.
CPU
Decide how many virtual processors to use.
Begin with one vCPU, then adjust as needed.
Disk Type
Choose between fixed and dynamic disks.
Fixed VHD disks are better for quick performance.
By choosing and tweaking these VM settings carefully, you can boost your Hyper-V’s performance greatly. This customization helps your Hyper-V match specific needs, increasing your productivity.
Troubleshooting Common Hyper-V Issues
Working with Hyper-V may bring up some challenges. Knowing common issues helps ease troubleshooting. We’ll look at vital steps like checking installation, hardware support, and sorting network problems in Hyper-V.
Verifying Installation
It’s vital to check your Hyper-V installation regularly. Make sure all needed features are installed. Opening the Hyper-V Manager lets you see the virtual machines and their states.
Using PowerShell commands helps confirm the setup is correct. It’s smart to look for Hyper-V Services in Windows Services Panel. This ensures everything runs smoothly.
Checking Hardware Support
Good hardware support is key for Hyper-V to work well. Check if your processor supports virtualisation and that it’s on in the BIOS. Make sure technologies like Intel VT-x or AMD-V are turned on.
If your hardware doesn’t support these, you might face errors. Checking this prevents common troubleshooting headaches with Hyper-V.
Resolving Network Issues
Network troubles can mess up Hyper-V and affect virtual machine connections. It’s crucial to set up virtual switches correctly. Also, look for any issues with physical network adapters.
Using best practices is important. Make sure the management OS and virtual machines use the right network. Staying on top of this reduces network issues.
Conclusion
In this Hyper-V summary, we’ve seen how it brings strong features to Windows 10. Hyper-V makes it easy for users to set up and control virtual machines. This means you can have different operating systems on the same physical computer. It’s great for both newbies and experts in IT, making it easier to do more with your computer.
To get the most out of Hyper-V, your computer needs a 64-bit processor and at least 4GB of RAM. Hyper-V’s key features include disaster recovery and better development settings. It also offers tools like Failover Clustering and Hyper-V Manager. These help manage virtual systems well, showing the real value of virtualisation.
Learning more about Hyper-V’s functions, tools, and tips is wise. This knowledge helps you use technology better, whether for hobbies or work. It opens up many ways to use your computing resources well.
FAQ
What is Hyper-V and how does it work?
Hyper-V lets you run different operating systems on one computer. It uses a hypervisor layer for managing virtual machines. This makes resources use efficient.
Which versions of Windows 10 support Hyper-V?
Hyper-V works with Windows 10 Pro, Enterprise, and Education. The Home edition does not support it.
What are the system requirements for enabling Hyper-V?
For Hyper-V, you need a 64-bit processor with SLAT, 4 GB of RAM or more. Also, turn on hardware virtualisation in the BIOS.
How can I enable Hyper-V using Control Panel?
Open Control Panel and go to ‘Turn Windows features on or off’. Then tick the Hyper-V box. Follow the guide to install it.
What is the PowerShell command to enable Hyper-V?
Use `Enable-WindowsOptionalFeature -Online -FeatureName Microsoft-Hyper-V -All` in PowerShell. Remember, run it as administrator.
What should I do after enabling Hyper-V?
Once Hyper-V is enabled, restart your PC. Then, use Hyper-V Manager for setting up virtual machines.
How do I create a virtual switch in Hyper-V?
In Hyper-V Manager, find ‘Virtual Switch Manager’. Choose ‘New virtual network switch’. Pick the switch type you need and follow setup steps.
What common issues might I face with Hyper-V?
You may find issues with verifying Hyper-V’s installation, hardware support, or VM network problems. Each issue has its troubleshooting steps.
How can I verify if Hyper-V is installed correctly?
Check in Control Panel’s Windows Features if Hyper-V is ticked to confirm installation. Also, `Get-WindowsOptionalFeature -Online -FeatureName Microsoft-Hyper-V` in PowerShell shows its status.
Turning off Hyper-V in Windows 11 is important for users wanting better system performance or to use other virtualisation software. Hyper-V is a technology from Microsoft that lets you create and manage virtual machines. It’s great for setting up private clouds and improving business processes. Yet, it might not be right for everyone. If you’re…
The Hyper-V Host Compute Service is key in Windows for managing virtual machines. When it’s missing, users find it tough to run virtual operations well. Most problems show up with the Hyper-V Manager, making it urgent to fix. As per discussions among nine users, there are various ways to solve these Hyper-V issues. Restarting the…
Hyper-Threading technology makes computers faster, especially for multitasking and heavy apps. Developed by Intel, it lets one processor act like many. It makes CPU use more efficient. This boosts the CPU’s speed and how quickly it responds. We will explore how Hyper-Threading works, its advantages, and its impact on computing. What is Hyper-Threading? Hyper-Threading technology…
In today’s digital world, Hyper-V by Microsoft is key for cloud computing. This technology lets us run several virtual machines (VMs) on one physical server. It makes using resources more efficient and saves money. Hyper-V makes it easy for businesses to adjust resources as needed. This ensures they work well even when needs change. The…
Hyper-threading technology, created by Intel, marks a leap in modern computing. It lets one physical processor act like two logical ones. This boosts CPU performance and improves multitasking. With supported Intel processors, users get more from their systems. First seen in Xeon servers in February 2002 and then in Pentium 4 desktops, hyper-threading changed task…
The Lyte Hyper PC is leading the gaming world. It’s changing what users expect from a gaming PC. It combines top technology and design beautifully. This gives gamers the best experience. It’s perfect for both serious and casual gamers. The unbeatable performance makes every game better. Its cool design changes any space into a great…